Introduction
For quite some time now, I’ve harbored a keen interest in owning a personal blogging site. It’s become increasingly important to me to have a dedicated space where I can document and share my learnings to avoid catastrophic forgetting. After exploring various options, I discovered a powerful combination of tools and platforms that allowed me to bring my vision to life. In today’s post, I’ll walk you through my journey of building a website with a Jekyll template, hosting it on GitHub Pages, securing a unique domain name, and finding a reliable hosting service like Linode. So, if you are interested, let’s dive in!
Selecting a template
Given that my website’s primary purpose is to serve as a platform for documenting and sharing my learnings, I realized that an extravagant design or advanced functionality wasn’t necessary. Understanding my limitations in designing a website from scratch, I decided to take a practical route by selecting a pre-made template that I could personalize according to my needs.
For my personal preference, I decided to opt for Jekyll themes primarily because of their simplicity and their ability to free me from the burden of technical complexities.
Notes: If you choose other themes than Jekyll, you could skip to Hosting with Github Pages section.
Fork Jekyll Themes
If you have selected a Jekyll Themes that you are interested in, you could simply fork the repository.
Customizing Webpage Configuration and Folder Structure
Now that you have successfully forked your favorite Jekyll theme, it’s time to dive into personalizing and configuring it to suit your needs. Let’s take a closer look at the folder structure typically found in a forked Jekyll theme repository.

One of the key tasks in personalizing your Jekyll theme is editing the _config.yml file based on your preferences. This file contains important configuration details, and most theme authors provide instructions on how to modify it. To demonstrate, let’s take a short example from the _config.yml file of Hux Blog:
1
2
3
4
5
6
7
8
9
title: Jackson Kek
SEOTitle: Jackson Kek Blog
header-img: img/home_bg_.jpg
email: jacksonkek257@gmail.com
description: "Personal Blog | An AI engineer who doesn't want to be replaced by ChatGPT | 不想被ChatGPT取代的AI工程師"
keyword: "Jackson, Jackson Kek,Personal Blog, AI, Machine Learning, NLP, LLM, Computer Vision, Blogging, Deep Learning, Pytorch, Artificial Intelligence, Python, AI Engineer, Coding, , Dao Logs"
url: "https://jacksonkek.com" # your host, for absolute URL
baseurl: "" # for example, '/blog' if your blog hosted on 'host/blog'
...
In this example, you can see various configurable options such as the title, SEOTitle, header image, email, description, keywords, URL, and base URL. Editing these values allows you to customize your website’s metadata, appearance, and functionality.
Preview your website
Once you have made your configurations by editing the _config.yml file, you might be wondering how to view the changes you’ve made. Before you can preview or publish your website, you need to install several components. Follow the instructions provided here to install all the prerequisites based on your operating system (Linux, Windows, etc.).
Next, open your terminal and Install the jekyll and bundler gems.
1
gem install jekyll bundler
Change into your project directory.
1
cd your_project_directory
To build the site and make it available on a local server, use the command:
1
bundle exec jekyll serve
Browse to http://localhost:4000 or look for the url (server address) shown on terminal:
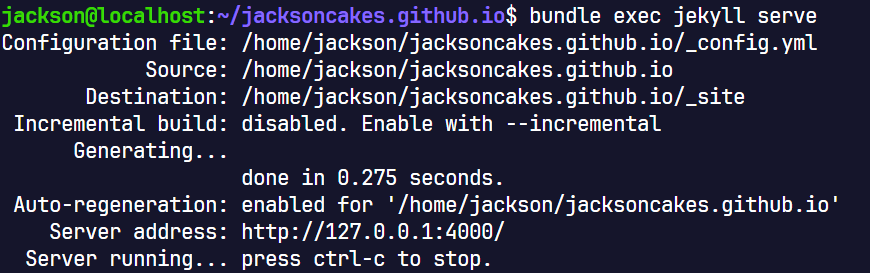
Yay, you have successfully run your website on your local!
Hosting with Github Pages
Now that your website is ready, it’s time to make it live by hosting it on GitHub Pages. Follow these steps to set up hosting:
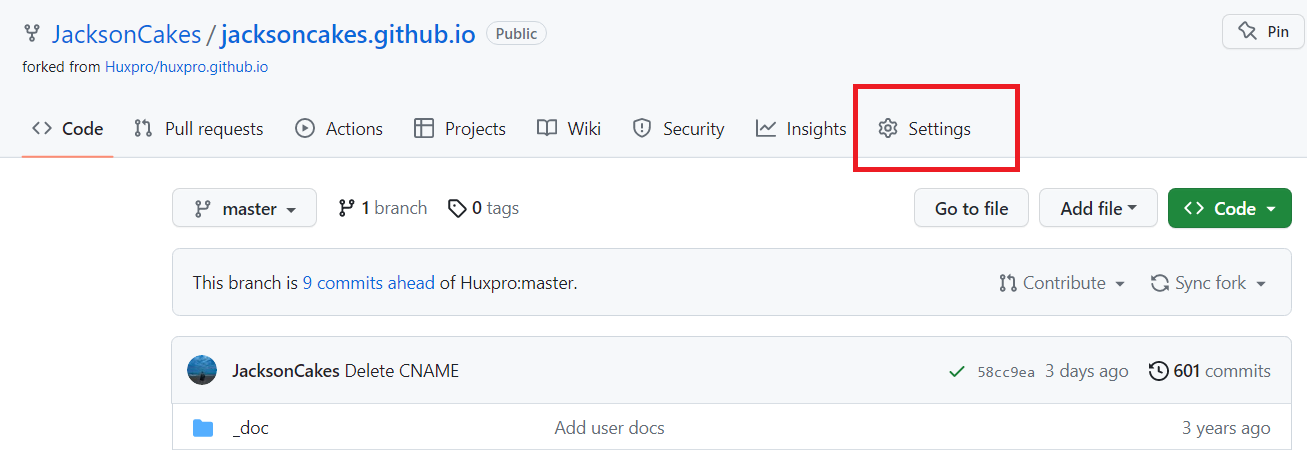
- Go to the settings of your GitHub repository.
GitHub Repository Settings
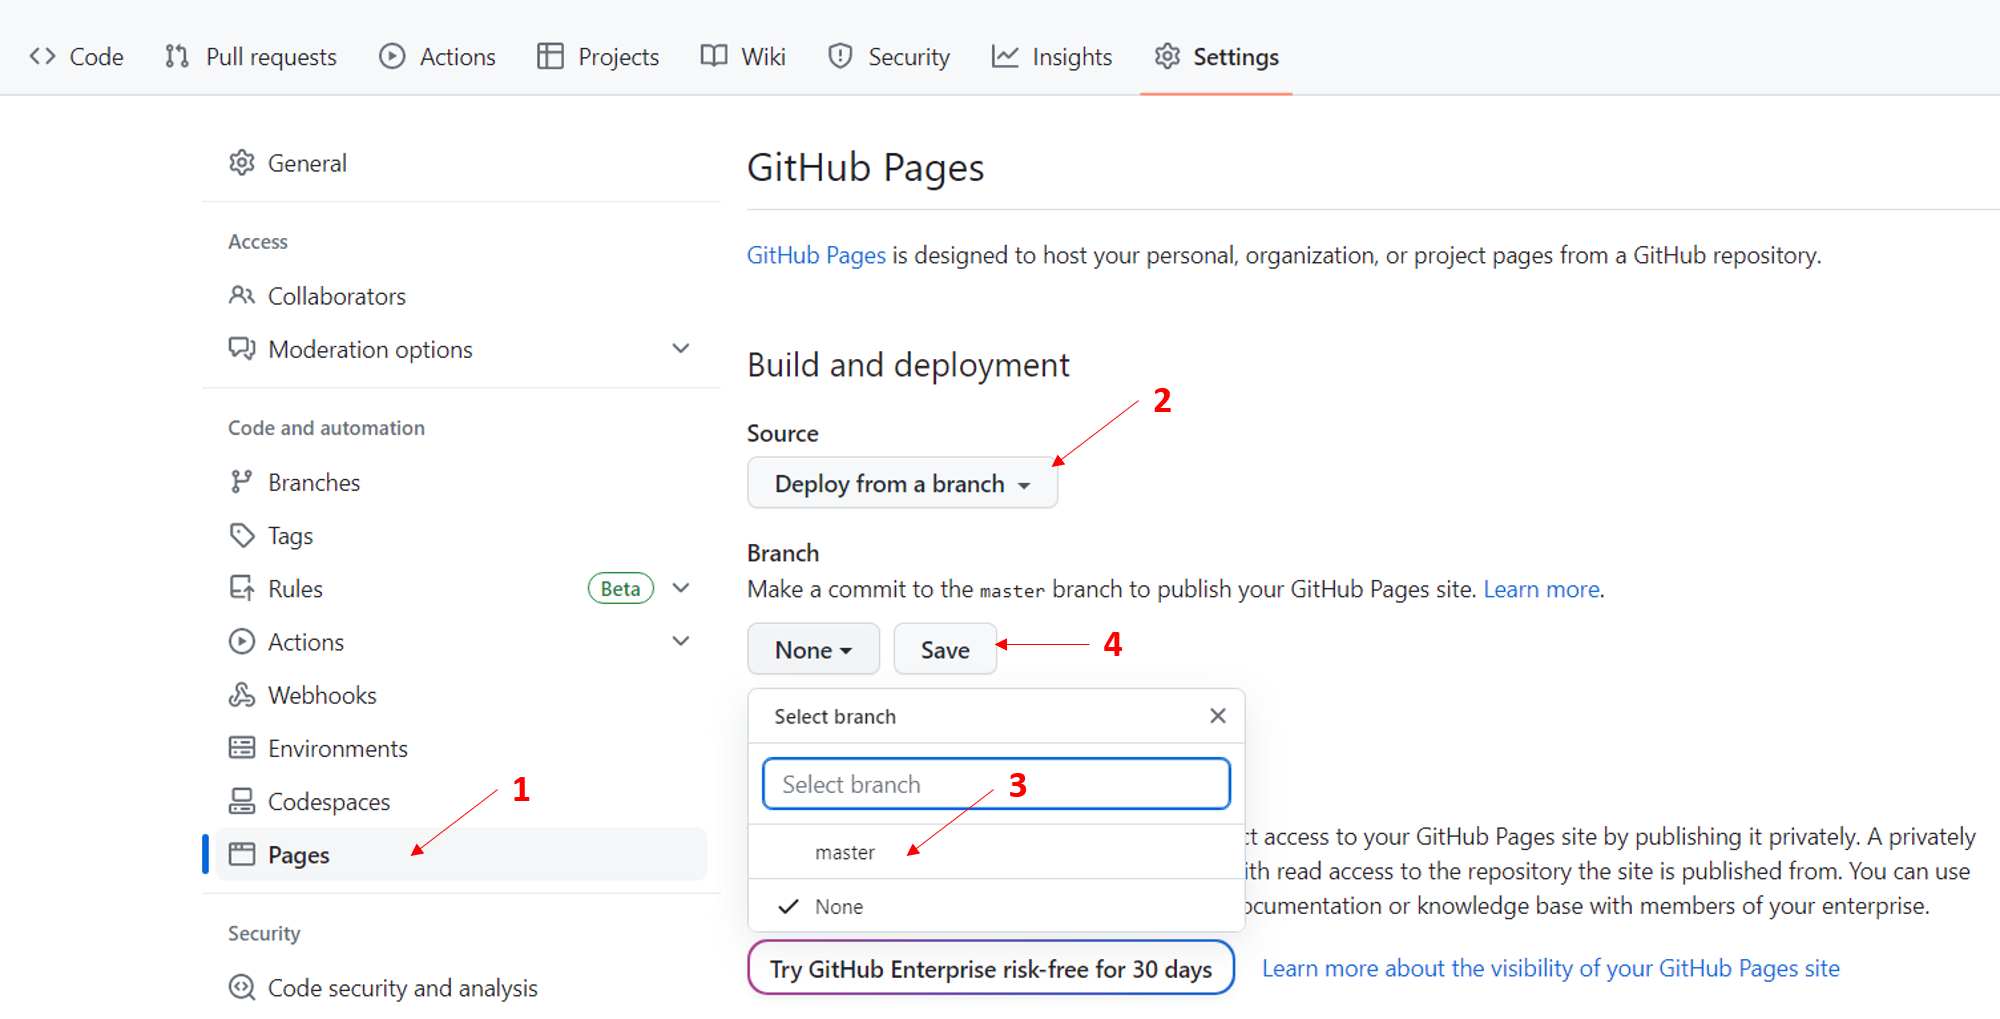
- In the settings menu, navigate to the Pages section.
- Under Source, select Deployment from branch.
- Choose the branch you want to deploy your website from, typically the master or main branch.
- Click on Save to apply the changes.
It’s important to note that your repository name should end with .github.io, as this will represent your website URL. For example, if your repository is named example.github.io, then your website will be accessible at https://example.github.io.
Follow these steps, and your website will be hosted on GitHub Pages, allowing you to share your work with the world. It may take a few moments for the changes to take effect, so be patient. Once the deployment is complete, you can access your live website using the URL associated with your repository.
Congratulations! Your website is now live and ready to be explored by visitors.
In my upcoming post, I will delve into the topic of using your own domain name and hosting your website with Linode which offers flexibility and customization. Stay tuned!